How do I collect spectral analysis?

The spectral analyses can be made on demand manually via the DynaPredict App, or periodically using the automatic Gateway collector.
The spectral analyses can be made on demand manually via the DynaPredict App, or periodically using the automatic Gateway collector.
By default, when the app collects data from a DynaLogger the internal memory of the device is erased, making it available to store more data in the future.
Alerts are automatically sent by e-mail to selected users whenever the alert of a spot is triggered.
Users need to have a “Subscriber” permission to receive the alerts.
Yes, whenever the defined velocity or temperature limits are violated, an alert will be signalled by the DynaLogger in the form of a red LED.
The user defines two limits, A1 and A2, A2 being the more critical.
If the ‘A1’ limit is exceeded, the red LED of the DynaLogger will flash once every 5 seconds. If the ‘A2’ limit is exceeded, the red LED of the DynaLogger will flash twice every 5 seconds. If neither limit is exceeded, the green LED of the DynaLogger will flash once every 5 seconds.
In addition, the DynaPredict Web Platform has a dashboard which indicates the points that exceed these alerts, allowing the prioritization of maintenance actions.
Yes, for a period of 1 year. Find out more here.
We suggest that you always have the updated version of the app. To do this, access the Google Play Store (Android) or App Store (iOS) and download the latest version.
The Web Platform is updated automatically, so no action is required.
No. The DynaLogger should be fixed on the machine to be monitored and configured to obtain measurements from that specific machine, thus generating a reliable history of data. In addition, many machines may need more than one point to be monitored, according to the need and degree of monitoring desired by your company. To find out more about installation and mounting of sensors, see “Mounting“.
Yes. In Brazil, the DynaLogger is ANATEL approved and INMETRO certified for Explosive Atmospheres/IP Code.
Outside of Brazil, the DynaLogger has the following certifications: FCC (United States), CE RED (Europe), IC (Canada) and RCM (Australia).
For more information, get in touch with our support team (support@dynamox.net)
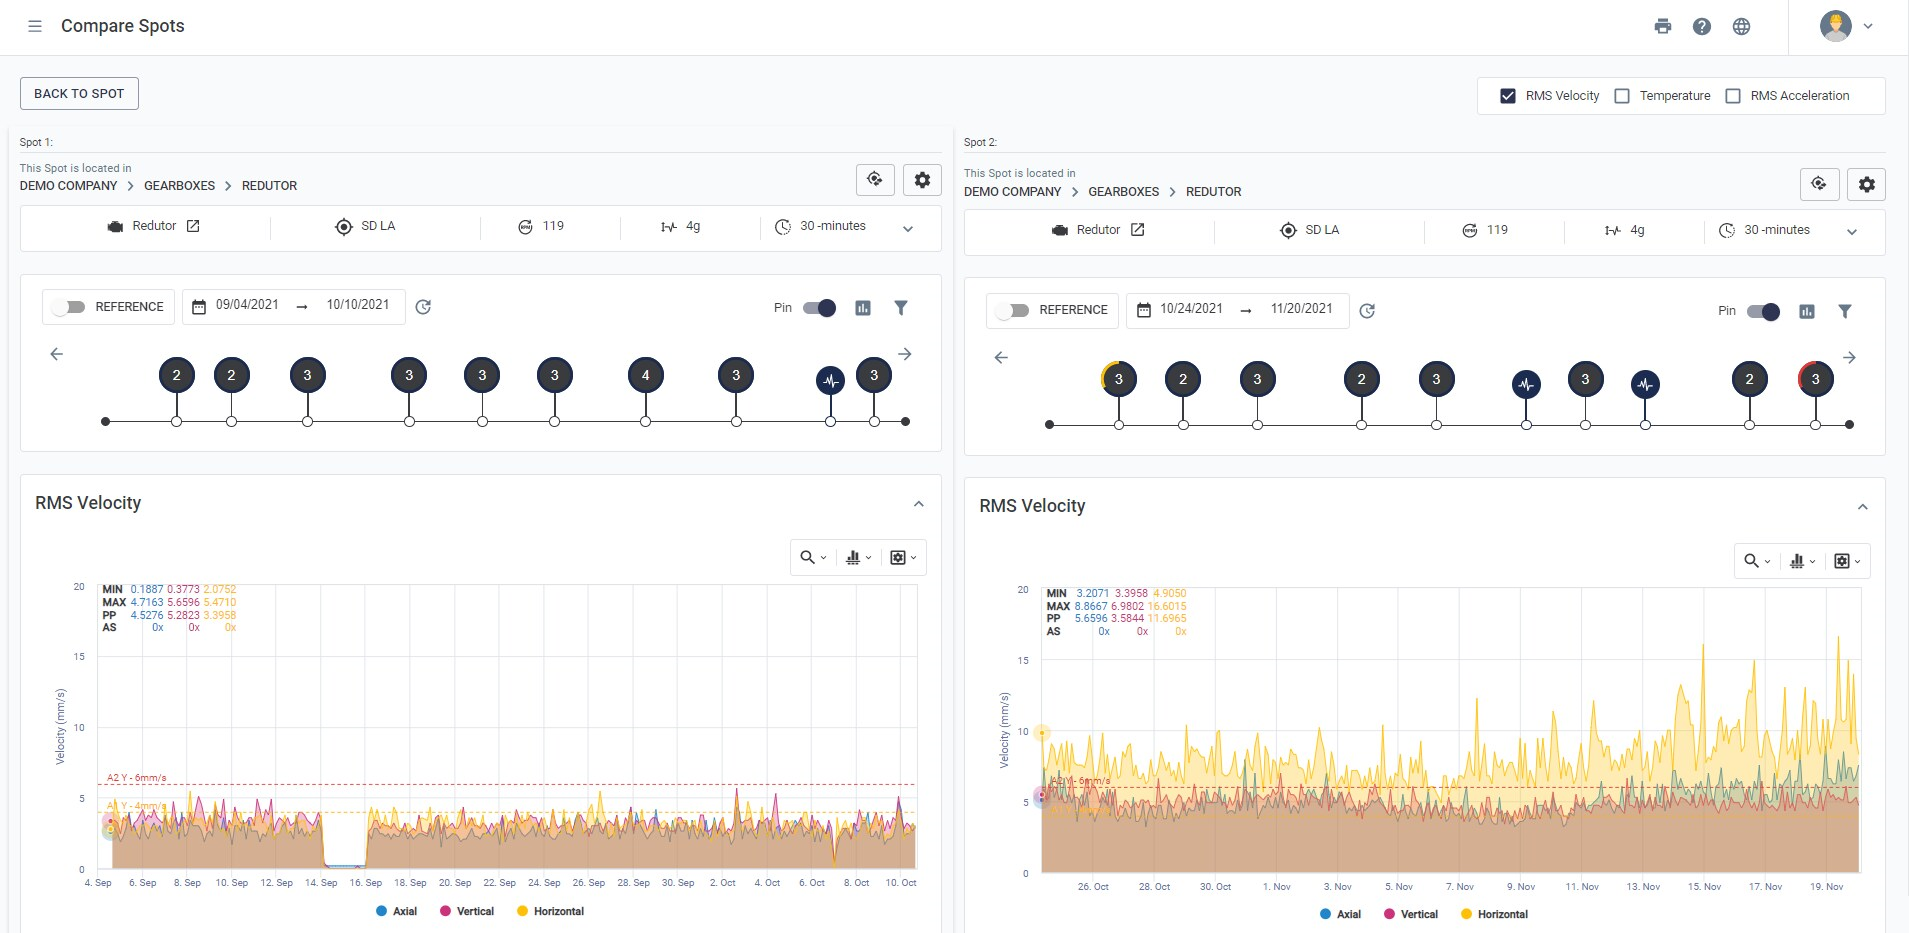
The Compare tool allows to compare continuous data from different time periods side by side.
The option is available in the upper right corner of the Spot Viewer screen.

After selecting the desired Spot, the data will appear side by side. You can change the desired period on each side.
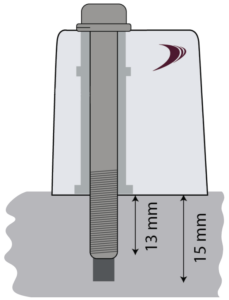
The mounting method is one of the most critical factors for measuring vibration. A rigid attachment is essential for avoiding false readings and data.
Depending on the type of machine and position, different mounting methods could be used. To get the best results from the DynaPredict solution, screw mounting is recommended. To do this, the installation surface must be prepared first, as described below.
Before choosing this mounting method, check that the installation point on the equipment is thick enough for drilling. If so, follow the step-by-step procedure below
Drill a threaded hole with an M6x1 threaded tap (supplied in kits with 21 DynaLoggers) at the point of measurement, at least 15mm deep.
Using a wire brush or fine sandpaper, clean any solid particles and scale on the surface of the measurement point.
After surface preparation, the DynaLogger attachment process should begin.
Position the DynaLogger at the measurement point so that the base of the device is completely supported by the installation surface. Once this is done, tighten the screw and spring washer* supplied with the product, applying a tightening torque of 11Nm.
* Use of the spring washer is critical to achieving reliable results.
Preparation of the Adhesive
The most suitable adhesives for this type of fixation, according to tests conducted by Dynamox, are the Scotch Weld DP-8810 or DP-8405 structural adhesives from 3M. Follow the preparation instructions described in the manual of the adhesive itself.
Dynalogger Attachment
Apply the glue so that it covers the DynaLogger’s entire bottom surface, completely filling the center hole. Apply the glue from the middle to the edges.
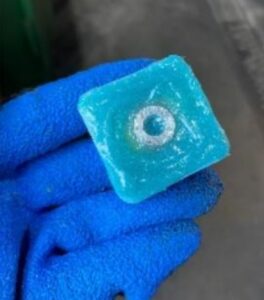
DynaLogger installation with glue fixation
Press the DynaLogger on the measuring point, orienting the axes (drawn on the product label) in the most appropriate way.
Wait for the curing time indicated in the manual of the glue manufacturer itself, in order to guarantee the good fixation of the DynaLogger.